You ever need a data table for a simple process and think “man I wish I could do this with a flow”. Well now you can. Thanks to the new Data Table component in Flows. It’s a great component to use. Let’s say you want to display a list of Employees saved as Contacts for your company and select which ones are to receive a Christmas Bonus. We start by creating the Flow and adding the GetRecord component to retrieve the Account Record.
We start by creating a special variable recordId (spelled exactly like this) which by default is passed to a flow.

Once we have created the variable it’s now available for us to use in our GetRecords Element. Select the “+” sign to add an element and select “Get Records” from the Data element section.

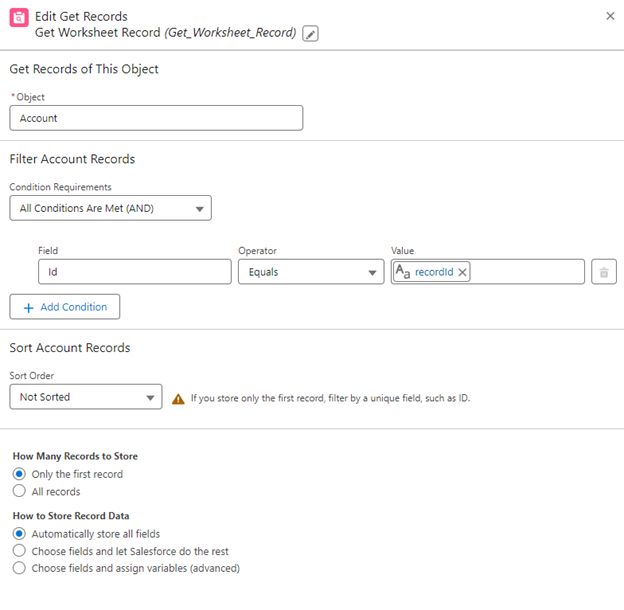
Now we need to filter the Account to select only the Account that we were sitting on when we launched the flow. That value is automatically assigned to the special variable recordId. We do this using the Condition Requirements which will act like a where clause in a SOQL query.
Simple enough eh? Now that we have the Record returned we need to select all the Contacts for this Account that have the Contact Type value set to “Employee”. You can do this via a Record Type or for this simple demo I created a custom field on Contact with a Pick list value of “Employee” for the purpose of this demo. You can choose to select all the fields or if you don’t need all the fields select the “Choose fields and let Salesforce do the rest”.

So now we have a record set we can bind to the Data Table. Next we choose to add a Screen. Now we set the values for the Form, Header, Footer, buttons etc.
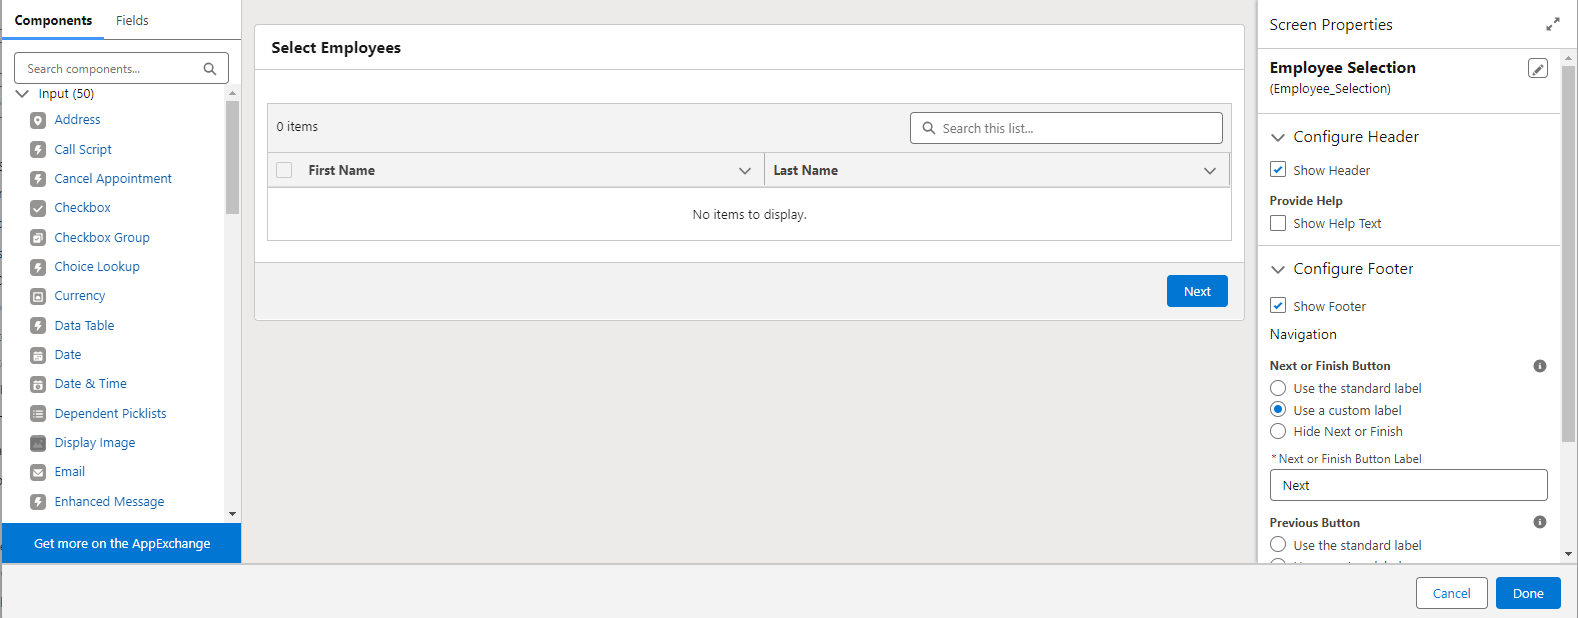
Next we add the Data Table Element to the Form.
First we set the Data Table Source Collection. This is the filtered GetRecords element.

For the purpose of this demo we’ll use the multiple selection value of the Data Table to allow us to select multiple Rows. I will also set the minimum and maximum display values.

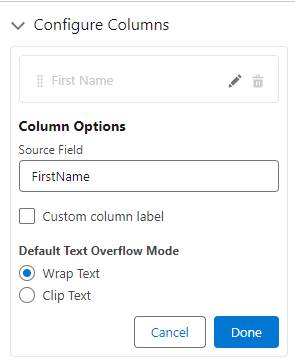
Once we have set those values we need to add the columns for displaying the Employees. No need to add a selection column the flow will do that because we selected Multiple. So create each column by selecting the field (which will be available from the Get Records Object)
Now that we have our fields we can save and debug the flow to see the list appear.

After we select a few employees they will be saved in the “selectedRows” member of the Data Table. Now we just need to loop through the employees so we can give them a bonus. To do this we need to use a Loop. Add the Loop to the flow. And set the parameters like below.

Now you just need to add your Employee Entry form in the For Each section of the Loop. In the form add a Display Text to show you the employee Name and a Currency field to enter their bonus amount.
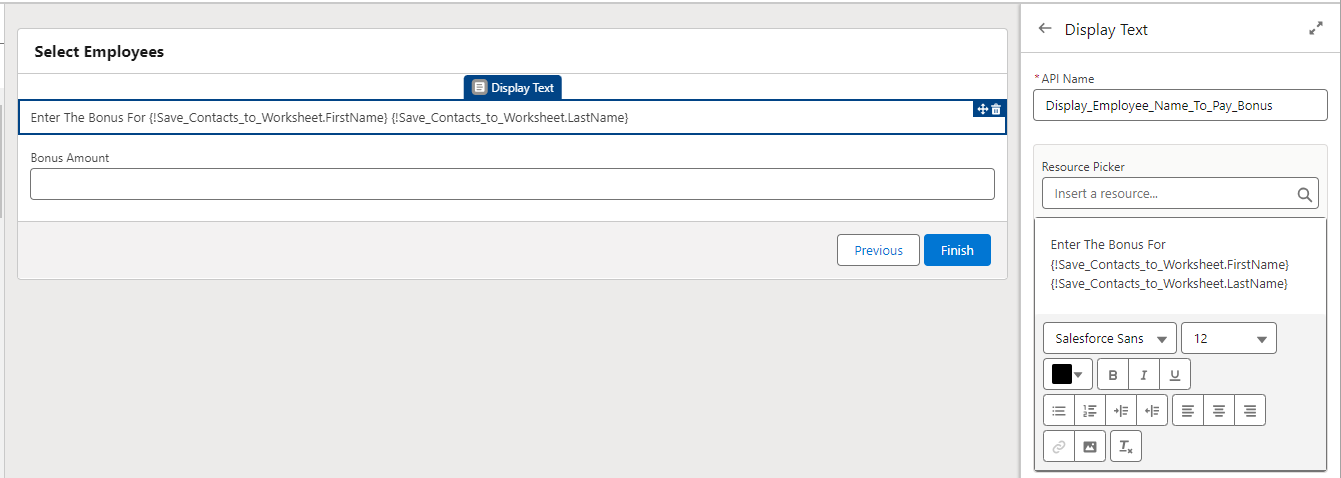
Save and Select Debug. Run it and you’ll see the form display each time for each employee you selected.

And just like that you can loop through a collection of Records and set values. No LWC or Aura components required.
[contact-form]